How to make your makeup look smooth and not cakey – Ultimate Guide!
The importance of having smooth, non-cakey makeup cannot be overstated.
Not only does it enhance your natural beauty, but it also gives you a confidence boost that lasts all day.
In this blog post, we’ll be talking about common causes of cakey makeup
and the techniques and products you can use to achieve a smooth, natural-looking complexion.
This post may contain affiliate links. That means if you click and buy, I may receive a small commission (at zero cost to you). Please see my full disclosure policy for details.

How to Prep Your Skin for Smooth Complexion
The first step to achieving smooth makeup is to prepare your skin.
This includes cleansing and moisturizing to create a smooth base for your makeup.
My all time favorite skinprep routine is this one: (I include links to my fav products for each step)
- cleanser
- moisturizer
- facial oil – I use this Rosehip oil, it’s great even for oily skin.
- sunscreen
- primer
It’s also important to use a primer that will help to smooth out your skin and extend the wear of your makeup.
When choosing a foundation, consider your skin type and your needed coverage.
A quick tips is to opt for lightweight formulas that will give you a natural finish, and avoid heavy, full-coverage foundations that can be drying and lead to cakey buildup.
But feel free to check my guide on foundation 101, which includes everything from foundation types to how to find the best for your skin type and perfect shade OR take the quick foundation quiz below, then come back to this guide.
Application Techniques

The right tools for application can make a huge difference in preventing cakey makeup.
A good quality makeup brush (either a buffer brush like this one or flat like this one)
or makeup sponge (either the original beauty blender or a good dupe like this sponge by elf)
will help to distribute the product evenly and blend it into your skin.
When applying foundation, use a dabbing or buffing technique to build coverage gradually and avoid over-applying.
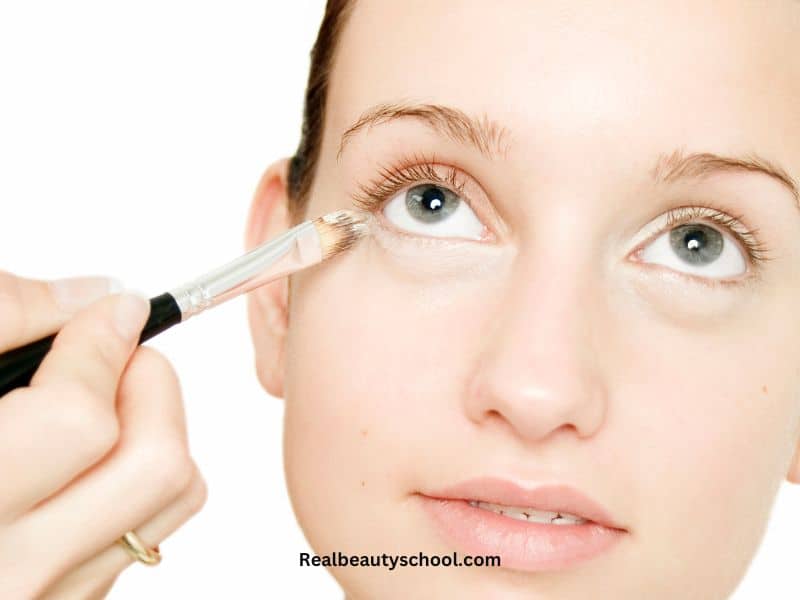
?For concealer, use a small brush to apply and blend the product precisely, avoiding the temptation to pile it on and create a heavy, cakey look.
Here’s a dedicated guide and tutorial on how to STOP concealer from creasing under the eyes if you want to check it out.
Using the Right Tools for Application:
In order to achieve smooth, non-cakey makeup, it’s important to use the right tools for application.
This includes choosing brushes or sponges that are well-suited for the type of product you’re applying, as well as ensuring that they are clean and in good condition.
Our #1 recommendation for Foundation brush is this one here.
And for a makeup sponge, the best is the original beauty blender
but if you are looking for an affordable dupe, the elf makeup sponges are REALLY good! And half the price of the beauty blender.
Applying Foundation
The key to avoiding cakey foundation is to use a light hand and blend thoroughly
There are two main techniques that can help achieve a smooth, even application: the dabbing technique and the buffing technique.
The Dabbing Technique:
This involves using a brush or sponge to lightly dab the foundation onto the skin, building up coverage gradually.
This is a great technique for those who use foundations more on the medium to full coverage finish.
The Buffing Technique:
This involves using a brush or sponge to swirl the foundation into the skin, blending it out for an even, natural look.
This is a great technique for those using sheer hydrating more natural foundation and avoid cakey buildup.
PRO TIP: Mix both techniques! First, apply your foundation with a brush using the buffing technique, and then with a makeup sponge, do the dabbing technique.
Applying Concealer:
Concealer is an essential part of any makeup routine, but it can also be one of the most challenging products to apply.
To avoid a cakey look, use a light hand and blend thoroughly, using a brush, sponge, or your fingers to apply the product in a tapping or swirling motion.
Additionally, make sure to choose a concealer that is the right shade for your skin tone, as a too-light or too-dark concealer can make the cakey look even WORSE.
I have an entire guide on how to prevent concealer from looking cakey, but in general,
this is the best concealer routine:

- Wear a lightweight eye cream (a heavy eye cream can be the cause of your concealer creasing)
- A good matte full-coverage concealer like this one is a MUST (some hydrating concealers creased, that’s the reality)
- Avoid cream concealers
- Do not apply foundation in the undereyes area (unnecessary layers of makeup, lead to cakeyness)
- Apply a small amount of concealer
- Blend your concealer immediately after applying
- Let your concealer sit for 5-10 minutes. After that, take a CLEAN makeup sponge (or the same you used to apply it without adding more product) and blend it again.
- Only and ONLY after the last step above, apply setting powder. Which? A translucent setting powder like this one.
Setting Your Makeup

Setting your makeup with powder and a setting spray will help to prevent cakey buildup and extend the wear of your makeup.
When choosing a powder, look for a lightweight formula like this one that will set your makeup without adding additional weight.
A setting spray like this one here will help to lock your makeup in place and give you a fresh, long-lasting finish.
?attention to your setting spray!
Setting spray is a crucial step in achieving a smooth, non-cakey complexion.
However, if not used properly or if the wrong type is chosen, setting spray can actually contribute to cakey makeup.
It’s important to understand that setting sprays come in different formulas, some of which can be too heavy or oily for certain skin types.
This can lead to buildup, especially if the skin is already prone to oiliness.
Additionally, applying too much setting spray can cause makeup to appear cakey and heavy.
OR simply some setting sprays doesn’t match the rest of the products you are wearing for your base makeup (primer, foundation, concealer etc)
Do the test! Do your makeup as we teach above, and apply your setting spray only half of your face. Apply your setting powder as usual. See what happens after 2 hours, after 4 hours, and after 8 hours. If you notice your makeup starts to look cakey or patchy on the side that you indeed apply the setting spray, This is the cause!
Suspend the product. And look for more options.
I’ve found that some setting sprays do exactly the opposite of what they are meant to do to my skin.
So hopefully, this is not your case!
To avoid these issues, it’s important to choose a setting spray that’s formulated for your skin type and to apply it sparingly.
Additionally, we recommend using setting spray in a specific way.
Rather than drenching your face with it, lightly mist the spray in an “X” and “T” formation, holding the bottle about 8 to 10 inches away from the face.
This will help to distribute the product evenly and avoid excess buildup.
Lastly, it’s important to let the setting spray dry completely before touching your face or applying any more makeup.
This will help prevent disturbing the delicate balance of the makeup and prevent it from appearing cakey.
In conclusion, using setting spray is an important step for achieving a smooth, non-cakey complexion, but it must be used properly.
Selecting the right formula for your skin type and applying it sparingly, in combination with other touch-up tips and techniques, will help ensure a flawless and natural-looking finish.
Touching Up Throughout the Day
Cakey buildup can occur as your skin produces oil throughout the day. To avoid this, consider using blotting papers to remove excess oil, and avoid touching your face with your hands.
If you need to touch up your makeup, use a setting spray and a powder to refresh your complexion.
These quick touch-up tips will help to keep your makeup looking smooth and natural all day long.
Tips for avoiding cakey buildup
When it comes to touching up your makeup throughout the day, it’s important to avoid creating cakey buildup.
One pro tip is to always use a blotting paper or matte powder to soak up any excess oil, rather than layering on more foundation.
Another tip is to use a lightweight, oil-free setting spray to refresh your skin and help keep your makeup in place.
Quick touch-up tips for a smooth complexion
If you need to do a quick touch-up, it’s best to only apply the products where you need them, such as under your eyes or on any blemishes.
This will help prevent cakey buildup in areas where you already have a smooth complexion.
A pro makeup artist tip is to carry a small, travel-sized bottle of your favorite setting spray or face mist like this one of thermal spring water + your powder foundation (this one here is the BEST powder foundation for touch up, cheap and GREAT quality) in your bag for quick and easy touch-ups on-the-go.
How to get rid of makeup lines
So, you know when you put on your makeup and then a few hours later you look in the mirror, and there are these visible lines where the makeup has settled into your fine wrinkles or creases?
That’s what we call “makeup lines”.
They can be pretty frustrating, right? But don’t worry, there are a few things you can do to minimize them.
To avoid or minimize makeup lines, it is important to choose the right tools, such as makeup brushes or beauty sponges, and to apply products evenly and in a light, thin layer.
Additionally, blending techniques, such as buffing or tapping, can help to smooth out any lines or rough edges.
how to stop my makeup from looking cakey under eyes
have you ever noticed that your under-eye makeup starts looking cakey after a few hours?
It’s a common problem and can be so frustrating! But don’t worry, there are a few things you can do to avoid it.
First, make sure to prep your skin by moisturizing and using a primer to create a smooth base.
Then, when applying your concealer, use a light hand and don’t pile on too much product. Instead, blend it in gently using a beauty sponge or your finger.
Finally, set your under-eye makeup with a translucent powder and consider using a setting spray to lock it in place.
By following these tips, you should be able to achieve a smooth, non-cakey look that lasts all day long!
How to apply makeup step by step for smooth complexion
Here’s a step by step guide to help you achieve a smooth and flawless makeup look:
Prep your skin: Cleanse your face and apply a moisturizer. Let it sink in for a few minutes before moving on to the next step.
Prime your skin: Use a makeup primer to create a smooth base and to help your makeup last longer.
Apply foundation: Use a foundation brush or beauty blender to dab foundation onto your face. Start from the center of your face and work your way out. Blend thoroughly, making sure to cover any imperfections.
Apply concealer: Dab concealer under your eyes, on any blemishes, and around your nose. Blend well to avoid any lines.
Set with powder: Dust a light layer of powder over your entire face to set your makeup and help it last longer.
Apply bronzer: Using a brush, sweep bronzer over the areas of your face where the sun would naturally hit (cheeks, forehead, and jawline).
Apply blush: Apply a small amount of blush to the apples of your cheeks and blend well.
Finish with setting spray: Give your makeup a final mist of setting spray to lock everything in place.
Remember to always blend each product thoroughly to avoid any makeup lines and to give your skin a smooth and even appearance.
Final thoughts on how to apply makeup for smooth skin without looking cakey
In conclusion, smooth, non-cakey makeup is achievable with the right preparation, techniques, and products.
By cleansing and moisturizing your skin, using a primer, and applying your makeup with the right tools, you’ll be on your way to a fresh, natural-looking complexion.
Setting your makeup with powder and a setting spray, and touching up throughout the day will help you to maintain a smooth, non-cakey look all day long.
We hope you found these tips helpful, and encourage you to try them out and share your experiences in the comments.
For additional resources, check out the makeup tutorials or product recommendations below to help you on your journey to a flawless complexion.
- How to Apply Makeup if you have Mature skin (full guide)
- How to apply Eyeshadow like a Pro! (Ultimate Guide)
- 10 reasons why your foundation looks dry and flaky (and how to fix it)
- How to Avoid concealer to crease under eyes (Full tutorial + pro tips)
- How to prep your skin for flawless Makeup Application!
- The right order to apply your Makeup products!
Get your FREE copy of the makeup guide for beginners by completing the following form!


