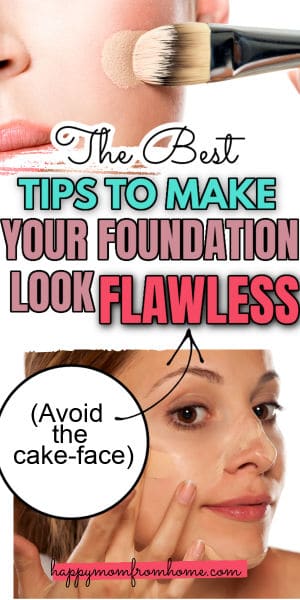
The Ultimate Foundation Application Tips: Your Definitive Step-by-Step Guide to Achieving Flawless Skin
As a professional makeup artist, I’ve always believed that the right foundation can completely transform your makeup look.
How you apply foundation depends on your specific skin needs and desired look, and using the correct tools can make a huge difference in your makeup application, regardless of the other makeup steps.
There’s a lot of types of foundations formulas, color shades and finishes out there, and can be frustrating and overwhelmed find the right foundation for you and apply it the right way.
This comprehensive foundation article by a makeup artist will help you find the best formulation and color shade for you, plus it includes a step-by-step foundation tutorial at the end!
This post may contain affiliate links. That means if you click and buy, I may receive a small commission (at zero cost to you). Please see my full disclosure policy for details.
Makeup Foundations types
Liquid foundation

Liquid foundation is easy to manipulate with tools or even your fingers. It has a different consistency, and some people prefer very liquid foundations because they feel like you can blend them quickly and feels lightweight on the skin.
The problem is that this type of liquid foundation usually doesn’t have enough coverage, which can be good for a natural finish.
However, you can find liquid foundations with high coverage that still look radiant and natural, like the Estee Lauder foundation; it’s our #1 top recommendation.
I highly recommend LIQUID foundation, and it’s the most popular formula, but there are a bunch more formulas to CONSIDER.
Cream foundation
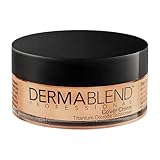
- Full coverage, natural finish
- Creamy texture, never cakey or masky
- Smudge and transfer-resistant wear for up to 16 hours when set with Dermablend Setting Powder
- Repairs & strengthens the skin barrier
This type of foundation usually comes in a pot, and you can’t easily access the product with your fingers; instead, you need a brush to apply it.
Be careful with this type of foundation since it can be full coverage, and you can get an amazing, fully glam look.
Still, you need to take extra care when using it and always disinfect it thoroughly because it can be easy to contaminate the pot.
Or you can try a creamy foundation like this one that has a smooth finish and is from Maybelline.
Foundation stick
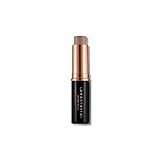
This type can be perfect for covering any blemishes or scars, tending to be super full coverage, and since it is super compact, you can get it everywhere.
Consider that this foundation also tends to be thicker than others, such as a liquid foundation, so keep in mind the benefits and the coverage.
You can use it as a concealer for big areas to cover.
Powder Foundation

This type of foundation is super convenient to a go-to retouch makeup during the day, and go perfect for oily skin. But usually, you can’t get a full coverage using this product alone, so you need to combine it with a liquid or creamy foundation.
This type is perfect for a no-makeup makeup look since you can use a primer and then apply the powder foundation to get a natural finish.
An affordable drugstore powder foundation that I recommend is this one.
Note: I don’t recommend using a creamy foundation and then set it with a powder foundation; this can cause oiliness and clog pores. Instead, Set with a translucent powder with no color, so you don’t overload your makeup.
RELATED MAKEUP POST: Best Makeup tips for Hooded Eyes (Secreat Hacks Revealed!)
Tinted moisturizer

This type of foundation can also be part of skincare products. If you prefer the natural everyday makeup look or are looking for a foundation to use daily, you will definitely love this one!
A tinted moisturizer will give you light coverage and will not cover scars or blemishes but can be very useful in summer when you don’t want a layer of beauty products on your skin.
Usually, it leaves a dewy and bright finish on your skin, perfect for mature skin.
If you have oily skin look for a matte tinted moisturizer, My favorite tinted moisturizer is this one by It cosmetics! It’s literally a Full coverage Mouisturizer with 50 SPF!
Also, foundations are classified by coverage
let’s take a look.
Makeup Foundation Coverages
You can find the coverage on the package on your foundation ( or in specifications online)
and it is super important to choose the right for you and your makeup routine!
Low to medium coverage
Low to medium coverage is perfect for the everyday makeup routine, tends to give you an even tone on your skin without covering all, and keeps your look natural.
You can also build your coverage with a powder foundation.
The Best light to medium coverage Foundations formulas
1.NARS Sheer GLow Foundation (Shop at ULTA)
2.LANCOME Teint Idôle Ultra 24H Long Wear Matte Foundation (Shop at ULTA)
3.REVLON Colo Stay Foundation (Shop at ULTA)
4.NEUTROGENA hydro-boost Hydrating tint (Shop on Amazon)
Medium to full coverage
Medium to full coverage is for a full glam look! Or skins that have blemishes and scars.
Often, you can build your coverage, adding more layers of foundation.
Best medium to full coverage
1.Maybelline Super Stay Matte Foundation (Shop at ULTA)
2.Too Faced Born this way medium-to-full coverage (Shop at ULTA)/(Shop on Amazon)
3. It Cosmetics Bye-bye Foundation Full coverage (Shop at ULTA)
4.Tarte Cosmetics Amazonian Clay (Shop at ULTA)
Foundation Finishes
Makeup Foundations contain different formulas that can leave good or bad finishes depending on your skin type.
That’s why your favorite beauty blogger may love some foundation, but it didn’t give you the best results.
These finishes can be dewy, satin, and matte.
It is essential to choose the best one for you based on the following tips.
Matte finish
Matte is perfect for oily skin! It’s a foundation finish that drys out all the oiliness on your skin and usually lasts for hours.
My drugstore favorite Matte foundation is this piece of gold.
Dewy finish
The dewy finish is the best friend for dry skin! It can give you a natural, glowing, and youthful finish and it’s perfect for young skin as well.
My go-to dewy finish foundation is this one.
Note: Dewy finish can accent wrinkles or expression lines because of the brightness
Satin finish
The satin finish is in the middle of the last two finishes.
It doesn’t dry out your skin, and either give a super hydrated-glowing finish.
It can be ideal for combination skin types! And also for mature skin.
This one is just fantastic!
RELATED MAKEUP POST: How to apply liquid Eyeliner the right way (tutorial with pictures)
High-end foundation vs Drugstore Foundations
This dilemma can be a topic to write a lot about. I think we can make it easy with the short answer, look for ingredients and quality!
No matter the price. Maybe you will found the best ingredients in a drugstore foundation (you actually can), or you find the best ingredients for you in a high-end one.
We need to bring up the subject; Cheap foundation means cheap ingredients or packaging.
But not always, pricy products means quality.
You have to analyze every product you buy for your skin, especially if you will use it every day.
In general, when choosing a foundation, avoid the following ingredients:
Fragrance
- Parabens
- Triclosan
- Methenamine
- Quaternium-15
- DMDM hydantoin
- Diazolidinyl urea
- Imidazolidinyl urea
- Sodium hydroxymethyl glycinate
- Bronopol (2-Bromo-2-nitropropane-1, 3-diol)
- Phthalates
Especially be careful with anti-aging foundation because it may contain retinol, which excellent anti-aging ingredient.
But retinol should be used only with night products because the combination with sun exposure can be toxic and cause cancer. Source
If you avoid those ingredients, you can buy a drugstore foundation, knowing that you are taking care of your skin.
RELATED MAKEUP POST: The Truth about High-end VS Drugstore Makeup You need to know!
My top 3 Best Drugstore foundations
2. Maybelline Super Stay Full Coverage Liquid Foundation Makeup
3. L’Oreal Paris Makeup Infallible Up to 24 Hour Fresh Wear Foundation
How to find my foundation match
First, you will need to identify your undertone, and once you know your skin type, tone, and undertone, you can follow these tips.
- At-store ask for help to someone, they should be the best advisers to you to choose your right shade (Use your criteria since you can meet someone who doesn’t know if you recently got a tan or if your skin tends to be oily, etc.)
- When you are trying examples, wait 10 minutes at least to see how the foundation will oxidate. Some foundations oxidate two or even three tones darker or in another undertone, and the final result can be different than the application.
If you are shopping online…
- Compare your skin tone with a beauty Youtuber that shows the foundation that is using and try it if you have a similar tone.
- Also, you can take a look at this online ULTA foundation shade based on every brand.
- Look for names on the tones that you have already used in another brand; it can be a similar tone. For example, I always look for a medium beige, golden, or olive names.
- If you are insecure about two shades, I recommend going for the lighter one because you can always build your tone with bronzer, powder, and blush.
- Look for brands that have match guaranteed, so you can exchange the shade if it doesn’t match your skin.
How to find my undertone?
There is a straightforward trick to identify your skin tone very quickly.
Find the natural light of the sun, and look at your arm looking for your veins.
All the veins in humans are blue, but the skin tone is that it will give the final tone to what we can see on our skin.
So if your veins are blue and your skin has a yellow-warm undertone, your veins will have to look greenish.
If you find your veins between purple and blue, you have a cool undertone, since blue and pink form the purple color.
If you think you have a combination of the two or are not sure about the color, you have a neutral undertone.
Related Foundation post: How to Fix a Wrong Foundation Shade (like a Makeup Artist!)
How to apply foundation for mature skin?
Mature skins tend to be dry; that is why they should be away from matte foundations.
Instead, you should look for a foundation with a satin finish.
The ideal is a very light formula that has enough coverage to give uniformity to the skin tone and a proper skincare routine.
Best foundation for mature skin is this one from bare minerals
Check this article where I share the best makeup tips to show off young and fresh skin.
right tools to Apply Foundation
You can have the best formula for your skin, the best finish, the ideal tone and undertone for you, but without a correct application technique and the right tools, your foundation will not be desired.
Is it best to apply foundation with a brush or sponge?
You can use even your fingers to apply foundation, but there are specific points to consider before choosing the right tool to apply foundation.
Makeup sponges tend to leave a more blurred and natural finish, and I love how I can blend it even sometimes where I applied a lot of product.
It is a star product that must you must have in your makeup kit, and your foundation will not look the same if you do not use it.
But not all makeup sponges are the same, nor do they all work.
By starting this trend with Beauty Blender (which is the original and the best), many other well-known and not-so-well-known brands will launch their version of beauty blender on the market.
I have tried many, and here I will list the differences:
1. Low-quality sponges are harder.
2. When trying to moisten them, they do not absorb water. As a result, they consume more of the product, and your product finishes faster.
3. The technology of a cheap sponge does not blend the product the same.
The best makeup sponge is the original beauty blender! But this makeup sponge here is a GREAT DUPE to the Beauty blender!
On the other hand, we have the foundation brushes.
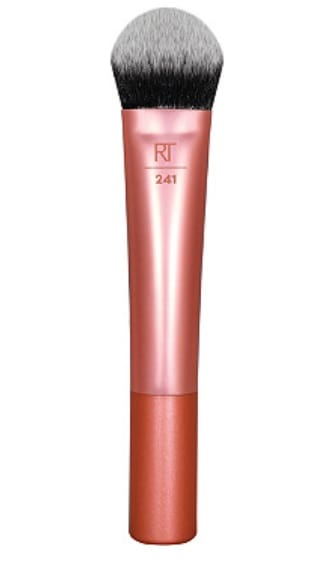
This type of brush is excellent for concentrating the product, making the most of its coverage, and not wasting it.
The finish is not the same as the blend of a makeup sponge, but it is still excellent.
PRO TIP: Whichever tool you use, I recommend warming the foundation first with your fingers before applying it to your face to activate it and better results.
I need to mention that my favorite blender for my face has been the TATI beauty (TATI isn’t paying me to write this), But you need to know that I use my Tati beauty sponge (or something like that haha) every single day.
It gives you the benefit of a brush and a sponge at the same time, and since it is super Big, you can apply foundation, powder, blush, highlight, bronzer, and more with it.
RELATED MAKEUP POST: Every day Makeup Routine (The Simple Makeup routine to look Pretty and awake!)
How to Apply Foundation Tutorial
Step1: Prime your face
Primer and foundation go together, and a good primer will highlight the foundation and vice versa, if you have the best foundation and a primer that does not benefit you, you will not have good results.
Find a primer that will fill your pores and smooth your face like this one here.
Wait 5 minutes for your skin to absorb the product before continuing with the next step.
Step 2: Warm the foundation with your fingers
Take a bit of product (less is more, and you build your coverage later), place it to your fingers and warm it for some time between 5-10 seconds.
Step 3: Place the product to your face
Place the product strategically in a zone where you want more coverage
like blemishes, pimples, marks or discoloration, Instead of applying the common 5 points on your face.
And from there, start to blend all over your face. This way, you will have the problem areas covered from the beginning.
You need to quickly pass to the next step to avoid let the foundation dry.
Step 4: Blend it all over your face
With a makeup sponge, blend the product perfectly all over your face until you look natural with a smooth finish.
Step 5: Set with powder
If you have used a medium to full coverage foundation, you don’t want to add another layer of color so you can go for a translucent powder to set your makeup.
If you used a light coverage foundation, you could add more coverage by applying a powder foundation.
This step is where you can play with the coverage and finish you want. If you applied a foundation with a dewy finish, look for a translucent powder and only use it to problem areas such as the T zone. But if you want a very glowy finish, do not apply powder to your entire face.

How to apply a full coverage foundation
Related Makeup Post: Top 10 Makeup remover wipes under 10$
If you are looking for a full glam look, with full coverage, it is possible to follow the next makeup tips (also check this post on how to know how much makeup is too much?).
You have to be very careful because you can also easily get the cakey finish that nobody wants on the face.
1. Apply two layers of makeup. This may sound too much, but if your foundation says medium to full coverage regularly, it is because the coverage can be built according to your preference.
2. Apply a high coverage concealer also in problem areas.
3. Use color correctors to cover undertones and create a smooth look. This is a great topic that I will touch on in a full article.
4.Set with loose powder to make this finish more durable
How to avoid the cakey-foundation
UPDATED: I have a Complete Guide on how to FINALLY stop your foundation from looking cakey, patchy or dry here! with the Ultimate foundation hacks, I’m using to always get a FLAWLESS finish.
1. Moisturize your skin very well before starting your makeup routine. A perfectly moisturized skin benefits a lot to avoid the cakey effect.
2. Apply primer on your face and leave it to act for a few minutes, it is essential not to skip this step since primer prepares your skin for and softens it.
3. Apply the least possible product; the cakey effect in your makeup can be caused by the excess product. Beauty gurus apply too much product, but it can be so that it is seen in the video, and the audience can appreciate it, do not repeat that technique on your skin.
It is best to apply little by little until you get the coverage you want.
4. Never set your makeup base with a compact powder foundation; this practice makes you apply a layer of color on top, making your makeup look very heavy.
If your makeup was light and low coverage, you could touch up with a powder foundation, but it is better to use a translucent powder when you have a high coverage foundation.
Related: How to Apply Powder Foundation like a Pro (Without looking Dry or Cakey!)
FINAL THOUGHTS ON HOW TO APPLY FOUNDATION
I hope that finding your ideal makeup base will be very easy for you now, and I think it is perfect for trying various formulas and brands because that way you can use each one depending on the look you want to achieve every day and every time.
I hope this article has been helpful, if so, please share it!
What is the foundation that you use every day?
Feel free to comment with any questions.
RELATED MAKEUP FOUNDATION POSTS:
- 12 luxury Foundation Dupes (That Are So Good!)
- Everything you need to know about Eyebrows (Full Tutorial for beginners )
- –How to fix a Foundation Shade that doesn’t Match your Undertone! (Easy tutorial)
- –Why Your foundation Looks Cakey (& How to FINALLY fix it!)
- –How to Fake a Face-lift with Makeup (Step by Step Tutorial)


Very good tips and tricks for foundation application! I usually use a makeup brush to apply the foundation, then go over it with a damp beauty blender to give a flawless look. I enjoyed this read!!
Hi Allyesha! I’m so glad you found this post helpful! And that’s exactly what I love to do with my foundation. Another tip that I’ve been doing is pre-warm the foundation with my fingers before applying it on the face, so it melts better on the skin 🙂