How To Apply Blush For Mature Skin (My face-lifting hack!)
In this blog post, we will walk you through everything you need to know about selecting and applying blush that not only complements your mature skin but also enhances your natural beauty.
From the perfect peachy tones for warm skin to the rosy blushes ideal for cool complexions, we’ve got your back.
Plus, we’ll share some nifty tips and tricks on application techniques that will leave you looking radiant and youthful. So, let’s get that blush brush ready and start this journey to a fresher, brighter you!
How to choose the right blush shade for mature skin
The first thing to remember when applying blush to mature skin is to choose the right shade.
You want to choose a shade that complements your skin tone rather than one that clashes with it.
For example, if you have cool-toned skin, you’ll want to choose a blush with cool undertones, such as pink or mauve.
If you have warm-toned skin, you’ll want to choose a blush with warm undertones, such as peach or coral.
When applying blush, it’s also important to use the right tools and techniques.
For example, you’ll want to use a fluffy brush rather than a dense brush, as this will help to create a more natural-looking flush.
It’s also a good idea to blend the blush well with a fluffy brush, fingers or a makeup sponge, so that there are no harsh lines or edges.
You can also layer different textures of blush, such as using a cream blush as a base and then layering a powder blush on top for added definition.
If you want more info on how to apply blush, and in general, how to apply makeup for mature skin, you can check out our Master Makeup Program, a comprehensive online program that teaches everything from the basics of makeup to advanced techniques like mature skin makeup and bridal makeup. It includes a printed makeup manual delivered to your home, digital text-based training and even the option to get a certificate of completion after an easy assessment. Get more info here.
What color blush makes you look younger?
The color of blush that makes you look younger is one that complements your skin tone.
A good rule of thumb is to choose a shade that is similar to the color you naturally flush when you’re embarrassed or excited.
This will ensure that the color looks natural and blends seamlessly into your skin.
For fair skin, a soft pink or peach shade will give you a youthful glow.
For medium skin, a soft coral or apricot shade will work well.
And for darker skin, a rich plum or bronze shade will look beautiful.
It’s also important to remember that our skin tone can change as we age, so it’s always a good idea to re-evaluate your shade choices periodically.
Experimenting with different shades and textures is also a good idea to find what works best for you.
Here’s a list of the best blushes for mature skin.
However, I should say that a specific color won’t make you look younger, instead, the application technique will.
For example, if you are applying your makeup with old techniques, it can make your look, older.
And if you do makeup with new trends and techniques, you will also look younger.
Another example is eyebrow makeup, inside my makeup program in the makeup for mature skin section I go over this in more depth, but in general, if you do your eyebrows with an 80’s or 90’s technique, it won’t really make you look youthful.
Rather, trying new makeup trends (appropriate for mature women; we are not doing things like a teenager, of course) can instantly make you look 10 years or younger! Just by changing a technique in a makeup routine of 5 minutes.
Same thing with blush! I have a tutorial here on how to use concealer, contour and liquid blush to lift your face and eyes!
Step-by-Step Tutorial: Achieving a Youthful Glow with Blush on Mature Skin
Step 1: Lay the Foundation
First things first, let’s start with a clean canvas. Apply your base makeup as you normally would. This includes your foundation, concealer, and any color correction you need.
The goal here is to even out your skin tone and create a smooth surface for your blush to glide onto.
Remember, the key to a natural look is blending, so take your time to ensure everything is seamless.
This post may contain affiliate links. That means if you click and buy, I may receive a small commission (at zero cost to you). Please see my full disclosure policy for details.
Step 2: Powder Blush for a Subtle Base

Now, grab your powder blush.
Choose a shade that complements your skin tone and apply a light layer to the apples of your cheeks.
This step is all about creating a subtle undertone that will add depth to your blush.
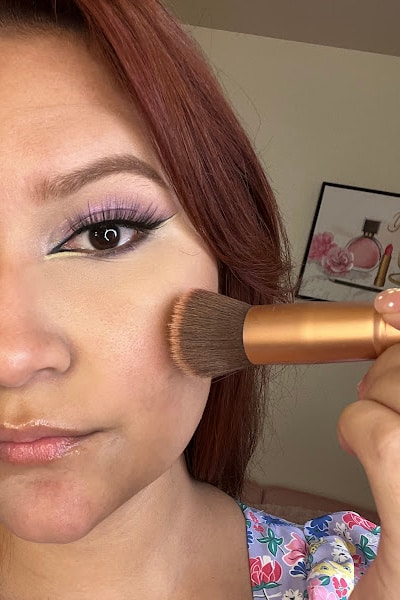
Use a fluffy brush for a soft, diffused look. The idea is to add just a hint of color – nothing too overpowering.
Step 3: Amplify with Cream or Liquid Blush
Time to bring back that juicy, natural glow!
Take your cream or liquid blush and apply it on top of the powder blush.
This layering technique – powder followed by cream – is our little secret for ensuring both durability and coverage without losing that natural, luminous look.
Gently dab the cream or liquid blush onto your cheeks and blend it outwards. This adds a fresh, dewy vibrancy to your skin.
Step 4: Optional Pink Setting Powder

For an extra touch of youthfulness, lightly apply some pink setting powder below your under-eyes and over some of the blush areas.
This step is optional, but it can really make your blush pop and give you that fresh, youthful aura. It’s a subtle touch, but it can make a big difference.

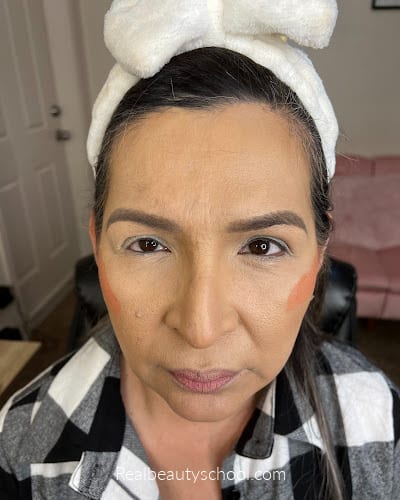
Blush Placement Hack
Now, let’s talk about placement.
The trick to a lifted, rejuvenated look is to apply your blush slightly higher than the traditional placement.
Instead of the apples of your cheeks, aim a bit higher, closer to your cheekbones.
Then, sweep the blush up toward your hairline.
This technique creates an illusion of a lifted face, drawing the eyes upward and giving you that sought-after youthful look.
Remember, makeup is an art, and you’re the artist.
Feel free to experiment with these steps and find what works best for you.
The goal is to enhance your natural beauty and feel confident in your skin. Happy blushing! ????????

Conclusion: Blush Your Way to Youthful Radiance
And there you have it – your guide to mastering the art of blush for mature skin!
We’ve got through the essentials of choosing the right shades, layering powder and cream blushes for lasting impact, and tweaking blush placement for that perfect lifting effect.
Remember, the key is to start with a well-prepared base, build up color gently, and always aim for a placement that gives your face a natural lift and youthful glow.
Embrace these tips and tricks to enhance your natural beauty, and don’t be afraid to experiment a bit.
Makeup is, after all, a wonderful playground for self-expression.
Whether you’re heading out for a casual lunch or dressing up for a special event, a well-applied blush can truly be your secret weapon for a fresh, rejuvenated look.
So go ahead, pick up that blush brush with confidence, and let your cheeks tell a story of timeless beauty. You’re not just adding color; you’re bringing life and vibrancy to your face.
and remember, you’re absolutely gorgeous at every age!