I want you to know that in Makeup, everything counts!
You can have the best makeup products, but if they aren’t for your skin type, the results will be disappointing.
And the same happens with the Order to Apply Makeup!
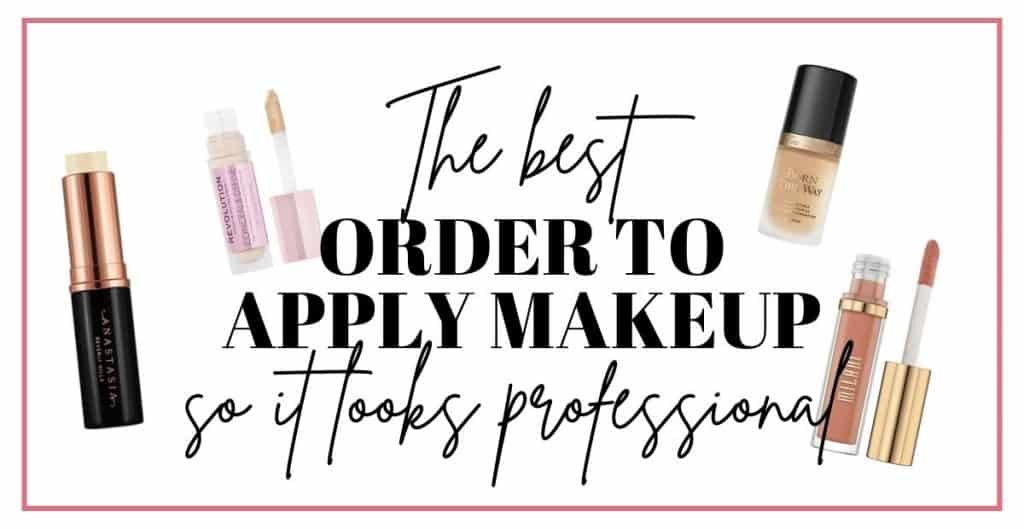
To get a flawless skin finish, you need to follow some steps and makeup application techniques.
I’m so glad that you stopped by this article, and as a Professional Makeup Artist, I will share my best Pro Tips and Steps for applying Makeup with you.
This post may contain affiliate links. That means if you click and buy, I may receive a small commission (at zero cost to you). Please see my full disclosure policy for details.
How to Apply Makeup Step by Step like a Professional
First, we need to get clear that there are no rules in Makeup!
There are some guidelines to follow, especially in colorimetry, skin age, and skin type (That is what we learned in Makeup School).
But Generally, You can make personalized Makeup Techniques and get fantastic looks!
As a beginner, I think you should start with learning tips from professionals to get better results (it will happen only with practice and patience)
I let you a recap of my How-to Makeup Guides and Step by Step Tutorials to a better understanding of every Makeup Step.
You can take the time to check first each of the tutorials OR keep scrolling in this article and review it after. I will leave the Link between every Step.
Let’s Keep going
The right Makeup Application Order
I’d dare to say that in Makeup, 50% is about Skin prep and Skincare!
So we will start with that.
Step 1. Skin Prep.
Definitely, Skincare Order, tips, and recommendations for every skin type is another topic to treat in another article, but I’ll share with you the basics.
A correct skincare routine will keep a clean base skin, with natural luminosity, and therefore, Makeup will look exceptional.
Your pre-makeup skincare routine should look something like this:
- Face Cleanser (I recommend a Soap-free Cleanser to avoid losing your natural PH on face)
- Antioxidant Serum (I recommend a Vitamin C and Hyaluronic Acid Serum like this one)
- Moisturizer (Check this link if you haven’t tried this piece of gold from neutrogena)
- Sunscreen (30 SPF at least, if you live in a hot city you should probably go for at least 50 SPF)
If you haven’t, you should try this fantastic sunscreen from Neutrogena that is an affordable price and has a dry-at-touch application so it can get a light oil-free finish.
UPDATE: After reading this post, check the other part of this “Makeup like a pro series”: The Ultimate guide on exactly what to apply on your face before Makeup for flawless Makeup application! Or you can read that post and then come back here to continue with the step by step Makeup order for every skin type.
Primer Before or after Sunscreen?
Apply All the Skincare products in your face First, wait 5-10 minutes to let it dry and set and then apply your Primer.
Primer is the layer that will maintain everything that you already apply to your Skin, refines your pores, and create the perfect base to apply the next makeup products.
You can try this Primer, or this one if you are looking for a matte look.
When applying Makeup, what goes first?
After having your Skin perfectly clean, moisturize, and prime, we can move forward to put on the next Makeup Product.
Step 2. Color correction
If you seek a natural everyday Makeup, you can avoid this step, since this is for more coverage and a look more even in your Skin.
The correction with colors has been the best ally for years, knowing how to use the undertones on your Skin, you can disappear or reduce redness, very dark circles or any blemishes or scars.
To start, you can try with a Color correction palette so you will have all the colors for any necessity. This Color concealer palette is fantastic!
If applicable, this is the time to apply a color correction concealer in your the target Areas.
For example, If you have redness, apply a greenish concealer in the specific area to cancel the undertones. Or, for very dark circles, you can use an orange color concealer.
Here I leave you a Color Correction Guide.

Apply just a little amount of product as we can still be building the coverage with concealer and Foundation in the next steps.
Move forward.
Step 3. Concealer
This is one of the steps that you can switch to each other, but keep in mind trying the best results that work for you.
My professional recommendation is that if you seek a natural look, start by applying foundation, and then see what areas need more coverage.
That way, you will add just the concealer that you need.
Otherwise, you can start with concealer in all the areas you want to cover and then apply a foundation to get a full coverage look.
Related makeup foundation post: Foundation 101 guide for Beginners and Intermediates
(Check the foundation for beginners guide, where I share the perfect formulas for every skin type and my best recommendations and tips for every finish then come back to this guide.)
These are the best affordable concealers in the Makeup market!
1. Maybelline Instant Age Rewind Eseaser Dark Circles
2. Neutrogena SkinClearing Blemish Concealer with Salicylic Acid
3. Maybelline Fit Me Liquid Concealer Makeup, Natural Coverage
Can I use Concealer without Foundation?

You absolutely can use concealer without Foundation, and this makeup technique can be perfect for a School/work makeup routine or a Daily natural look.
I recommend using just a small amount of concealer and always complementing it with a powder foundation so your skin will look even and, at the same time, natural.
But for the general recommendation, you will need a good foundation for your skin type and necessities.
Related Makeup Post: How to Apply Makeup without Foundation (Full guide with Pro tips for a flawless no-foundation makeup!)
Step 4. Foundation
Next step is Foundation, after color correction and concealing at this point, you will need Foundation to even the skin tone and add the last layer of coverage to any face area.
Pro tip: If you have mature skin or added too much product with the concealers, go for a bb cream, or light to medium coverage foundation to avoid cakey your Makeup.
This BB cream Foundation from BareMinerals can be perfect!
You can still add a full coverage foundation following the next tips:
1. Apply a small amount of product to build your foundation coverage layer by layer.
2. Use a Beauty blender (or makeup sponge) to blend it perfectly
3. When setting DO NOT use powder foundation, use a translucent powder instead with NO color. To avoid adding more color layers to your Makeup.
Related Makeup Post: Why your Foundation looks Cakey and Dry no matter what you do (& How to Finally Fix it!)
Next Makeup Application step…
Step 5. Eye Makeup
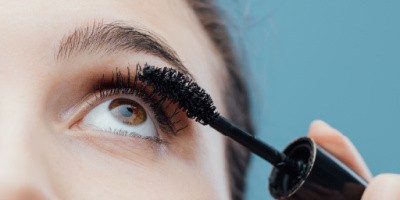
Like the last step, you either choose to switch the order or not. It depends on the final look, and the occasion.
If you are doing an everyday makeup look, daily, and looking for natural eye makeup (no dark eyeshadows), I recommend doing this makeup order.
BUT…
If you are doing special occasion makeup with colored eyeshadows, I recommend the opposite.
Related Eye Makeup Post: How to Apply Eyeshadow Like a Pro! (Complete guide for beginners + 5 easy tutorials!)
Eye makeup before or after Foundation?
Eye makeup should be applying before Foundation and concealer to avoid ruining your makeup foundation with loose powder eyeshadows, fallows out, glitter, or any product that can mess up previous work.
Especially if you are doing a produce eye makeup with dark eyeshadows tones, and glitter.
Related Makeup post: How to build your makeup kit (best starter makeup kits)
Eye Makeup Application order
If you are doing eye makeup with glitter and false lashes…
- Lid primer
- Upper lid Eyeshadow
- Glitter
- Eyeliner
- Eyelashes
- Mascara
- Down lid Eyeshadow
If you are doing a natural eye makeup…
- Lid primer
- Upper lid Eyeshadow
- Eyeliner (optional)
- Natural Eyelashes (optional)
- Mascara
- Down lid Eyeshadow (optional)
Next, you will be ready to define your eyebrows!
Related post: Should you apply eyeliner or eyeshadow first?
Step 6.Eyebrows
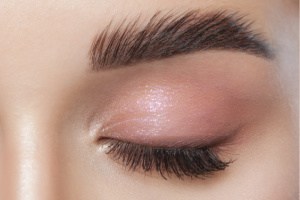
I have a full Eyebrows post with a lot of helpful tips for defining your eyebrows easy at home and a step by step tutorial with pictures for you.
Related Eyebrows post: How to shape your eyebrows at home in 5 minutes.
But in general, your eyebrows makeup should look like this:
- Clear (or tinted) Eyebrow gel (to set everything in place)
- Concealer (to define and clean the brow bone)
UPDATED: I now have a very specific brow routine different from this one that works best if you are looking for a natural fluffy and bushy eyebrows look, even if you have not eyebrows at all. Check this Easy Bushy Eyebrows Tutorial (with pictures) here.
NOTE: The next steps should be in the same formula presentation. Always finish all the cream products to continue with powder products.
You can entirely use all cream products (dewy or satin look) or all powder products (matte finish), but I recommend use cream contour, powder blush, and powder highlight.
Step. 7 Contour
If you choose a powder contour and blush, apply it after finishing the eyes and brows.
Contour can also be after your color correction, concealer, and Foundation ( Steps 2,3 and 4) if you chose a natural look and then do your eye makeup.
If you choose a cream contour or cream bonzer, check this guide on everything about cream bronzer with a step by step tutorial with pictures!
#1 Contour Makeup Products
Contour stick: L’Oreal Paris Makeup Infallible Longwear Shaping Stick Foundation
Cream Contour Palette: Makeup Revolution Ultra Cream Contour Palette by Makeup Revolution
Powder Contour: Aesthetica Cosmetics Contour and Highlighting Powder Foundation Palette
Related Makeup Post: The Best Hoola Bronzer Dupes you don’t want to miss out!
Step 8. Blush
Apply your powder blush. I love this one from Milani. If you chose a natural look, you can skip the Step 7.
and apply a cream blush to get a flawless natural blushy finish!
Step 9. Highlighter
For liquid highlighter, apply a little amount of drops after all the cream or liquid makeup products.
Or apply Powder highlighter to add a little natural shine to your look!
Setting Makeup Technique
After applying all the cream makeup products, you need to set with powder if you seek a makeup look that lasts.
My Pro Makeup recommendation is to apply a loose, translucent powder in only the oily (strategic) Areas that you want to mattify.
Avoid applying a powder foundation to do this because it can cause a cakey finish.
Check my how-to apply Foundation for more tips to avoid the cakey Foundation.
Step 10. Lip makeup
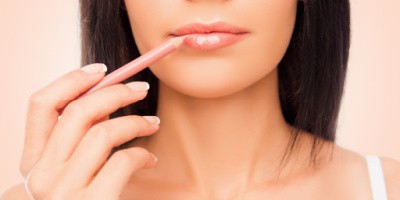
Lip Makeup Application order
BALM
It’s super essential to hydrate your lips every day! You can add this step to your skincare routine or do an Overnight Lip recovery routine with a lips scrub and a hydrating lip balm.
Pro tip: Also, you can start adding some lip balm on your lips when you are about to begin your Makeup, so you have a couple of minutes with the balm before putting lipstick in your lips.
But you can still apply a little amount of product before doing your lips Makeup.
LIPLINER
Next step is lip liner, try to go for a creamy pencil lip liner formula and avoid dry formulas, because we don’t want dryness on our lips (maybe matte finishes but not dry)
Usually, you will look for a lip liner that is similar or identical to your lipstick color and outline your lips.
Pro tip: You can play with the lip liner tones and undertones to create different illusions.
For a fuller lips look, you can go for a lip liner tone that is one tone darker than the lipstick (especially if you are using a nude color) Check this step by step guide on How to make your lips look bigger with my secret lip makeup hacks included!
LIPSTICK
Next is time for lipstick! Find your perfect formula, depending on your look.
For a Natural look: Go for a rosy, warmly, and nude tones OR if your eye makeup is supernatural, you can mix it with a fuchsia or red to add color to your face.
Classic eyeshadows: Depending on the intensity and colors that you used is how you will define your lipstick color.
If you have done a full glam eyeshadow makeup with glitter and eyelashes, you probably should yo for a nude-natural lipstick tone.
More attractive and aggressive: Lipstick tones like purple, dark brown, dark red, wine tones etc.
Remember, you can use any color or formula that you want, even if you are not following the makeup rules. You decide! Be you!
Related Makeup Post: The Best Drugstore Nude Lipsticks for every skin tone!
APPLY GLOSS OR COMBINE WITH ANOTHER LIPSTICK
If, for some reason, you don’t like the final lipstick look or your lipstick formula (or you are like me super undecided person haha), you can play with the tone and formulas of your lipstick!
You can turn any matte, satin, or velvet lipstick in a gloss lipstick with a clear gloss! My favorite gloss; you can check it here.
Also you can combine the colors.
Pro tip: If you used a matte liquid lipstick, you could combine with another lipstick only when it is still wet, but if it has already dry, don’t worry we can still work with it. Just apply a creamy lipstick on top instead of another matte liquid lipstick.
And then your Makeup is ready!
Don’t forget the last step…
FINAL STEP
SET your Makeup with a Setting spray so your Makeup can last hours!
How to Apply Makeup like a Professional: 5 Makeup application tips
TIP #1
Don’t be afraid of using your fingers whenever you need it! There are Makeup brushes and makeup sponges for every makeup step. It can also be timely and appropriate to use your fingers in some steps
(for example, for warming your Foundation before applying it)
NOTE: Obviously, you need to have a clean and disinfected hands before doing it (just like with makeup brushes ), especially if you are working with clients.
TIP #2
You can use your eyeshadows for contour, blush or highlight when you need the same color and vice-versa. For example, if you doing a monochromatic look, you can use eyeshadow as a blush.
Actually, I’ve loved this tip recently. I love applying a natural pinkish nude color on my lips and the same for blush and eyes or adding a pop of color on my eyes with Color eyeliner.
TIP# 3
Avoid doing your Makeup like all the Makeup Gurus on YouTube! I’m talking about the amount of product; you don’t need that much of Foundation, concealer, or contour.
Usually, they apply so much product to be noticeable in the camera, and don’t make the mistake of doing it on your face.
Applying less amount of any makeup product will always be MORE.
And so, you can take control and build your coverage and intensity.
TIP #4
If I had to choose THREE makeup products to use for a lifetime and only those three, I would go for mascara, blush, and lipstick.
You can skip, eyeshadow, eyelashes, and even eyebrows, but lipstick and blush give you color. And I also chose mascara to open my eyes and look more awake.
So this three alone can be a simple go-to makeup in 5 minutes.
TIP# 5
Try to keep regularly updated about new makeup trends (this is essential if you are offering services of Makeup but also for your daily makeup routine).
The makeup journey never ends, and I have to tell you that your makeup look and techniques can define your age and can make you look older than you real age just for using an old school technique or an old fashioned trend.
This can also be used in favor! You can look 10 years (or more) younger with a correct makeup application technique.
Try to take Makeup courses, and fortunately, there’s a lot of excellent makeup courses online!
So you can have a makeup certification or check new trends in the comfort of your home and at your own pace.
RELATED MAKEUP POST: 10 Tips to look younger with Makeup
Tips to Apply Makeup for oily Skin
The makeup sequence and makeup steps that I just share with you is a general order for makeup application.
But...

There is a specific tips to applying Makeup for oily skin.
Pro tip: Probably you already saw it on TikTok or youtube, but there’s a trend (that actually works) that said that you could add powder before your Foundation.
And it sounds crazy! Haha, But I been evaluated it for years now, and I can tell you that it works!
Try to apply your Primer first ( or you can even skip the Primer) and then apply a translucent loose powder all over your face. After that, use your Foundation like regularly.
These tips can blow my mind because using a powder product before a liquid-creamy one is just against every makeup rule, haha But like I said before in Makeup, you can break the rules and get amazing results!
The powder will absorb the oiliness and get you a mattifying finish; if you have oily skin, you need to try it.
Tips to Apply Makeup for Dry Skin
The makeup sequence and makeup steps that I just share with you is a general order for makeup application.
But..
There is a specific tips to applying Makeup for dry skin. You can skip any powdery step!
For dry skin (especially in winter), I recommend using liquid-creamy products like creamy contour, blush, and highlight.
Don’t use powder all over your face, and you don’t need it. You can set your Makeup with a setting spray.
You still can use translucent powder just to set specific areas like under eye, chin, or forehead. But keep the powder away from cheeks because this part tends to be drier.
FINAL THOUGHTS
The makeup application order is up to you! You can switch or skip any step.
You can also use this article as a guide to know what makeup products should be used (and formulas) to get the better look for you!
I hope you like this article, if so please share it and leave me any suggestion, question or comment below.

RELATED MAKEUP POSTS:
- The Best High-end Makeup Products that worth the splurge! (When to splurge when to save with Makeup)
- How to apply Eyeshadows for Hooded Eyes/Droppy eyelids
- Best Professional Makeup Starter kits (to build your Makeup kit the Smart way!)
- 5 Best Everyday Eyeshadow Palettes you need in your Makeup Kit!



Can you please send me a step-by-step instructions with product name and how to apply it on my skin please reply either via sms or email on [email protected]
Hi mojalefa! You can take a look at my Makeup guide ebook, it has super easy Makeup charts and makeup tutorials for every skin type and it’s only for $17 Check it here: https://realbeautyschool.com/made-easy-makeup-guide-ebook/