
Makeup Basics: List & Step-by-step guide for beginners
Are you looking to enhance your natural beauty and boost your confidence with makeup?
Well, you’ve come to the right place!
Today, I’m here to guide you through the basics of makeup and help you understand everything you need to know about the basics of makeup,
how to learn makeup, where to start on makeup if you are a beginner, and more advanced tips and tricks!
PLUS don’t forget to get your free makeup basics checklist below!
Let’s begin
Makeup basics: Where to start
Makeup is a form of art that allows you to express your creativity and enhance your natural features.
I just want you to remember two things:
- That every makeup pro was a beginner once, even me the author of this article,, just like you, EVERYONE starts at some point, and everyone can improve with practice.
- Makeup rules are made to be broken. Yes, I SAID IT. There are makeup rules or guidelines available for us based on the makeup theory, face shapes, color theory etc.
But for me, Makeup is an art.
Which it represents freedom.
Always use only what makes YOU feel confident and good. No matter the “rules”.
With that said, let’s get into the makeup basics.
Whether you’re looking to cover blemishes or create a bold look, makeup can transform your appearance and boost your confidence.
Knowing the basics of makeup is essential if you want to achieve a flawless look. It’s important to understand your skin type, choose the right products, and apply them correctly.
With these basics down, you’ll be able to create a variety of stunning makeup looks easily, no matter where you are in your makeup journey.
Thanks to this beautiful community and to you! (yes, you!! The one that is reading these words) I have been able to work and connect with different women from all over the world, hearing the most asked questions and concerns about makeup as a beginner.
And I have so much to say, so I decided to make this guide.
Easy for you to refer to every time you need it. I also have a printable guide available.
Feel free to grab your free makeup ebook here.
And one of the basics of makeup essential to know to get started is skin type.
Understanding Your Skin Type

Understanding your skin type and how this affects your makeup is key to the flawless application.
You can literally be using the most expensive, high-quality makeup product such as an expensive foundation, concealer, or primer, and getting horrible results on your skin if this product is not for YOUR skin type.
So let’s touch a little bit about skin type because you might have heard a lot about this everywhere on the internet:
- Dry Skin: If you have dry skin, it’s important to choose hydrating products that will nourish and moisturize your skin. Avoid matte products that can make your skin look even drier.
- Oily Skin: If you have oily skin, it’s essential to choose products that will control oil production and keep your skin looking matte. Opt for oil-free or matte-finish products.
- Combination Skin: If you have combination skin, it’s essential to choose products that will address the different needs of your skin. Use hydrating products on dry areas and oil-control products on oily areas.
- Sensitive Skin: If you have sensitive skin, it’s important to choose gentle and non-irritating products. Avoid products with harsh chemicals and fragrances.
- Normal Skin: If you have normal skin, you’re in luck! You have the most versatile skin type and can use various products.
A key few things to keep in mind are:
- Some “oily skins” do not necessarily need oil-free, matte products. Because oily skin can also be dehydrated skin, only using matte products can make it worse.
- We all have sensitive skin when it comes to picking the right products. Always seek for products without fragrances. The more organic, natural, and without too many ingredients, the better.
- There’s no such thing as “perfect skin” we all have seasons when our skin is more dry or oily than usual, and sometimes, we can get breakouts, and this does not mean we do not have beautiful, perfectly imperfect skin. We just need to change things slightly to improve our skin appearance.
I’ll be touching more about the best types of products on makeup products. But for now, let’s get to the essential tool and products for makeup.
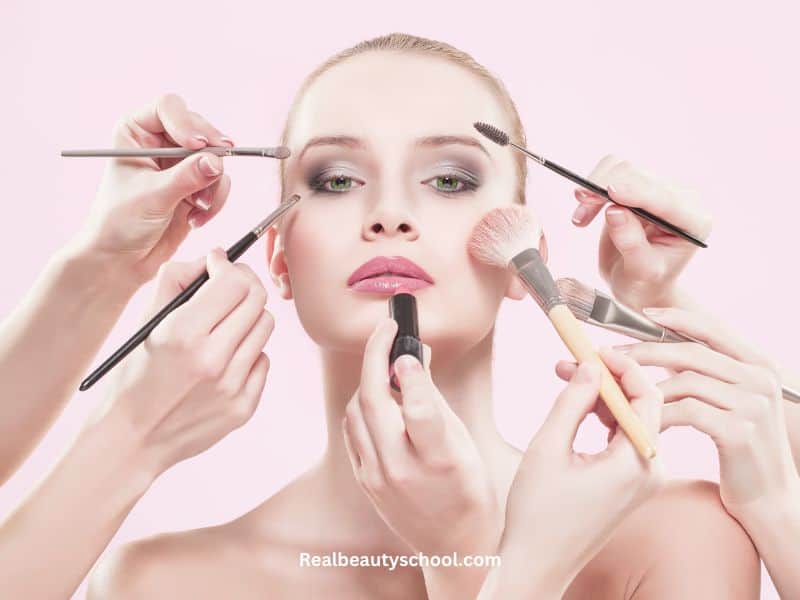
Tools and Products
You can get a free printable list of the essentials above, OR for only $5, you can buy the entire list with direct LINKS to recommended products here to build your makeup kit with the RIGHT products a pro would buy as a beginner.
Brushes: Brushes are essential for achieving a flawless makeup look. They allow you to apply products evenly and precisely. Here’s a full guide on 27 different types of makeup brushes and their uses.
Sponges: Sponges are another great tool for applying makeup. They’re especially useful for blending and creating a natural look.
Primer: Primer is the first step in creating a flawless makeup look. It helps to smooth your skin, minimize pores, and create a perfect canvas for your makeup.
Foundation: Foundation is a must-have product for achieving a flawless makeup look. It helps to even out your skin tone and create a smooth base for your makeup. These are my top ten foundations for beginners.
Concealer: Concealer is essential for hiding blemishes, dark circles, and other imperfections. It’s important to choose the right shade and formula for your skin type.
Here’s a guide on how to AVOID concealer from creasing under eyes.
Powder: Powder is a great product for setting your makeup and creating a matte finish. It helps to absorb oil and keep your skin looking fresh all day. There’s a difference between powder foundation and setting powder.
Setting powder is usually a translucent powder with lightweight ingredients that are meant to set the applied makeup pin in place, while powder foundation is pigmented and heavier to cover the skin, not necessarily to set the makeup.
Blush: Blush is a must-have product for adding color and life to your cheeks. It’s important to choose the right shade for your skin tone and apply it correctly.
Highlighter: Highlighter is a great product for adding a glow to your skin. It helps to enhance your natural features and create a radiant look.
Eyeshadow: Eyeshadow is a great product for adding color and depth to your eyes. There are a variety of shades and formulas available, so it’s important to choose the right one for your look.
Eyeliner: Eyeliner is essential for defining your eyes and creating a dramatic look. There are many different formulas available, so it’s important to choose the right one for your style.
These are the basic steps, every beginner should know and products to have in your kit, let’s dive in on each section of makeup.
Eye Makeup Basics
Eyeshadow
When it comes to eye makeup, eyeshadow is a must-have product to have in your makeup essentials kit.
Eyeshadow adds dimension and depth to your eyes, making them look more vibrant and awake.
There are so many different eyeshadow colors and finishes to choose from, so it’s important to know what looks best on you and what complements your style, and eye shape..
For a natural look, go for earthy and neutral tones such as browns, tans, and beiges.
If you want to make a statement, opt for bold and bright colors like blue, green, or purple.
For a special occasion, you can even try a smokey eye with shades of black, gray, and dark brown.
A Basic Everyday Eyeshadow Routine for beginners

In this tutorial, you will learn how to create a simple and beautiful eyeshadow look that is perfect for beginners.
We will be using two shades – a light eyeshadow to brighten up the center of the eyelid, and a soft brown eyeshadow to add depth to the crease and shape the outer corner of the eye. Here’s a really good everyday eyeshadow palette that is perfect for your makeup kit.
Let’s start
Step-by-Step Eye Makeup Tutorial for Beginners:
- Start with a clean and moisturized face, and make sure your eyelids are also clean and oil-free.
- Apply a neutral eyeshadow base or primer to your eyelids, this will help your eyeshadow stay in place for longer.
- Using a light eyeshadow color, such as a pale gold or cream shade, apply it to the center of your eyelid using a flat eyeshadow brush. Make sure to blend the edges for a smooth finish.
- Next, take a soft brown eyeshadow shade and use a crease brush to apply it to the crease of your eyelid. Start at the outer corner and sweep the brush towards the inner corner. Blend the color until there are no harsh lines.
- To further shape and define the outer corner of the eye, use the crease brush to apply a bit more of the soft brown eyeshadow to the outer “V” area. Blend until seamless.
- Finish the look by applying mascara to your lashes, and if desired, a subtle eyeliner to the upper lash line.
And that’s it!
You’ve now created a simple and beautiful eye makeup look that’s perfect for everyday wear.
You can always add more depth and drama by using darker eyeshadow shades or layering more colors.
If you are interested in knowing more about eyeshadow:
Get inspired with these tutorials:
- Halo eye makeup for beginners
- How to apply eyeshadow for Hooded eyes
- How to apply face and eye makeup for MATURE hooded eyes
- How to use your bronzer as eyeshadow (3 minutes makeup routine!)
Eyeliner

Eyeliner is an excellent tool for making your eyes pop. It can also be used to enhance the shape of your eyes and make them look bigger or smaller.
There are several types of eyeliner, including pencil, liquid, and gel. Choose the one that works best for you and your desired look.
I have found that the easiest eyeliner for beginners is a pen liquid eyeliner.
I do not recommend brush-tip liquid eyeliner neither gel eyeliner for beginners.
Pencil eyeliner is also easy to use and is great for a natural look.
Simply draw a line along the upper or lower lash line and smudge it for a softer effect.
Liquid eyeliner is more precise and creates a sharper line. I
t’s great for a more dramatic look.
Gel eyeliner is similar to liquid but has a creamy consistency, making it easy to apply and smudge.
However, you need to have more precision with this one because gel eyeliner is applied with a brush.
Just like with eyeshadow, you need to take into consideration your eye shape and desired makeup look overall to select the best eyeliner technique.
Here’s a mini guide to help you find the best eyeliner technique for each eye shape:
Almond-shaped eyes: Almond-shaped eyes are versatile and can handle different eyeliner techniques. A classic cat-eye or winged liner works well to elongate the eyes and make them appear wider. You can also try a subtle tightline along the upper lash line to add definition without overpowering the shape.
Round eyes: For round eyes, you want to elongate the eye shape and make them appear more almond-shaped. Opt for a subtle cat-eye or winged liner that extends outwards at the outer corner of the eye. Avoid a thick, rounded line that can make round eyes appear even more round.
Hooded eyes: Hooded eyes can be a bit tricky to work with, as the lid space can be limited. A tightline along the upper lash line can add definition and make the lashes appear thicker. You can also try a subtle cat-eye or a soft line that follows the natural curve of the lid. Avoid heavy eyeliner on the lid, as it can make the eyes appear smaller.
Downturned eyes: Downturned eyes tend to droop at the outer corner, making the eyes appear sad. To counteract this, you can use a subtle cat-eye or winged liner that extends upwards at the outer corner. This will help lift the eyes and give them a more open and youthful appearance.
Monolid eyes: Monolid eyes are characterized by a lack of crease, which can make eyeliner application a bit challenging. A tightline along the upper lash line or a soft, smudgy line along the lash line can help add definition without overpowering the shape. Avoid thick or dramatic lines that can overwhelm the eye.
Remember, these are just guidelines, and you can always customize and experiment with different eyeliner techniques to find what works best for you.
Mascara

Mascara is a staple in every makeup bag.
It’s the perfect finishing touch for your eye makeup, making your lashes look longer, fuller, and more defined. Choose a mascara that matches your desired look. For a natural look, go for a brown or black mascara.
For a more dramatic look, try a volumizing mascara or one with fibers that will add length and thickness to your lashes.
When applying mascara, start at the root of your lashes and wiggle the wand back and forth as you move toward the tips.
This will help to separate and define each lash. For an even more dramatic look, apply two coats of mascara and let it dry in between.
False eyelashes
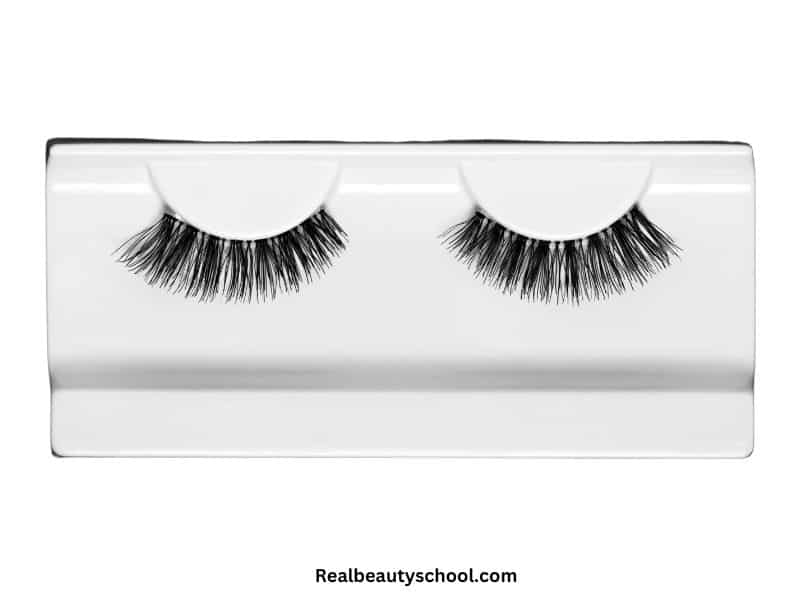
Wait! what? Did I just add false eyelashes to this BEGINNER guide? Of course, I did!
False eyelashes are a great way to enhance and add drama to your eye makeup look, EVEN if you are a beginner.
They can instantly make your lashes look longer, fuller, and more voluminous, transforming your eyes into the center of attention.
Here’s why false lashes are a great step to try and how to select the best false lashes for your eye shape:
False lashes are an easy and convenient way to take your eye makeup to the next level.
They are easy to apply, and with a wide range of styles, lengths, and thicknesses, you can find the perfect pair to suit your individual needs and preferences.
False lashes are also versatile, and can be worn for a subtle daytime look or a dramatic nighttime look.
I love how you can have literally a BAD eyeshadow look, and instantly improve it with false eyelashes. And of course, it takes to another level your gorgeous eyeshadow looks.
How to select the best false lashes for your eye shape
To select the best false lashes for your eye shape, you should consider the following factors:
Almond-shaped eyes: Almond-shaped eyes are versatile and can handle a range of styles. Look for lashes that are medium length and have a natural-looking curl.
Round eyes: For round eyes, you want to elongate the eye shape and make them appear more almond-shaped. Look for lashes that are longer at the outer corner and shorter at the inner corner.
Hooded eyes: Hooded eyes can be a bit trickier to work with, so you want to look for lashes that are shorter and more natural-looking. Avoid lashes that are too long, and avoid lashes that are thick and heavy.
Downturned eyes: To counteract the downturned shape of your eyes, you want to look for lashes that are longer at the outer corner and shorter at the inner corner.
Monolid eyes: Monolid eyes benefit from lashes that are medium length and have a natural-looking curl. Look for lashes that are dense and voluminous to add definition and make your eyes stand out.
False lashes can be a fun and easy way to transform your eye makeup look, and with a bit of practice, you can achieve a flawless application.
Just remember to select the best false lashes for your eye shape, and a simple false eyelashes adhesive, and you’re good to go!
Lip Makeup

Next up, let’s talk about lips! Lips are such an important feature, and they deserve just as much attention as the rest of your face. Whether you’re going for a bold statement or just a subtle pop of color, there’s a lip product out there for you.
Lipstick
Lipstick is a classic lip product, and it comes in a variety of finishes, such as matte, glossy, and cream. When it comes to choosing a lipstick, consider your skin tone and the occasion.
If you’re going for a bold look, choose a bright, bold shade, such as red or pink.
For a more natural look, opt for a nude or light pink shade.
Here’s a really affordable and high-quality set of lipstick for you to try
When applying lipstick, start from the center of your lips and work your way out to the corners.
This will help ensure that your lipstick is evenly distributed and doesn’t get smudged.
Lipgloss
Lipgloss is a great alternative to lipstick, especially if you’re looking for a more subtle look.
Lipgloss is typically sheerer than lipstick and provides a glossy, shimmery finish.
When choosing lipgloss, opt for a shade that is similar to your natural lip color.
This will help you achieve a more natural look, and of course, you can go for a lip gloss with bold colors like magenta, red and purple. I love that!
Lipgloss can be applied directly to the lips or over your lipstick for a more intense look.
Final Touch
Now that you’ve applied all your makeup, it’s time for the final touch!
Setting spray and touch-ups are crucial to making sure your makeup lasts all day.
Setting Spray & Setting powder

Setting spray is a must-have in your makeup bag. The only setting spray I recommend is this award-winning setting spray by Urban Decay
It helps to lock in your makeup and prevent it from smudging or fading. Simply hold the setting spray bottle about 8-10 inches away from your face and spritz evenly.
Let it dry for a few seconds before touching your face.
Setting powder is an important step in a basic makeup routine for beginners because it helps to set your makeup and prevent it from creasing, smudging, or fading throughout the day.
By applying a light layer of setting powder, you can lock in your foundation, concealer, and other base products, keeping your skin looking fresh and flawless for longer.
Using setting powder it makes ALL the difference! I highly recommend this loose setting powder here.
Setting powder also helps to control shine, especially in areas where your skin tends to get oily, such as the T-zone.
This can help to give your skin a matte finish and prevent your makeup from slipping or sliding throughout the day.
Additionally, setting powder can help to blur the appearance of fine lines and pores, giving your skin a smoother, more even texture.
By using a translucent or skin-tone shade, you can set your makeup without adding any extra color or coverage, making it perfect for beginner makeup enthusiasts who want a simple and straightforward routine.
Touch-ups
No matter how well you’ve applied your makeup, it’s bound to need a touch-up throughout the day.
Keep some makeup essentials, like powder, blotting papers, and lipstick, in your purse for easy touch-ups.
This will help keep your makeup looking fresh and flawless all day long.
Do’s and Don’ts for Makeup Beginners
Now that you know the basics of makeup, let’s talk about some dos and don’ts to keep in mind as you get started with makeup.
Do’s
Do Experiment:
Makeup is a creative and fun way to express yourself, so don’t be afraid to experiment with different looks and products.
Try different shades of eyeshadows, lipsticks, and blushes to find what works best for you.
Do Invest in Good Brushes:
Good brushes are an investment that will last you a long time and make a huge difference in the quality of your makeup application.
Make sure to clean your brushes regularly to keep them in good condition.
Do Prep Your Skin:
Before applying makeup, make sure to cleanse and moisturize your skin.
This will help your makeup look smooth and flawless.
Do Use Primer:
Primer is a key step in creating a flawless base.
It helps to smooth out your skin, minimize pores, and provide a base for your foundation to stick to.
Do Blend, Blend, Blend:
Make sure to blend all your products, especially when it comes to contouring and eyeshadow. Blending helps to create a natural, seamless look.
Don’ts
Don’t Overdo It: Makeup should enhance your natural beauty, not cover it up.
Avoid overloading your skin with heavy foundation and concealer, and instead opt for a lighter, more natural look.
Don’t Neglect Skincare: Makeup is only as good as the skin underneath, so make sure to take care of your skin.
Cleanse, moisturize, and protect your skin from the sun.
Don’t Skip Setting Spray: Setting spray is a crucial step in keeping your makeup in place all day.
Don’t skip this step, as it will help prevent your makeup from smudging and fading.
Don’t Neglect Touch-Ups: No matter how well you apply your makeup, it’s bound to need touch-ups throughout the day.
Make sure to keep some essentials, like powder and lipstick, in your purse for easy touch-ups.
Don’t Use Expired Products: Make sure to regularly check the expiration date of your products and dispose of any that have passed their expiration date.
Using expired products can lead to skin irritation and breakouts.
the dos and don’ts of makeup are just as important as the basics.
Experiment, invest in good brushes, prep your skin, use primer, and blend.
Avoid overdoing it, neglecting skincare, skipping setting spray, neglecting touch-ups, and using expired products.
Following these simple guidelines will help you achieve a flawless, natural look every time!
Final Makeup Tips
In conclusion, makeup is a fun and creative way to enhance your natural beauty.
Whether you’re just starting out or you’re a seasoned pro, it’s important to know the basics.
Understanding your skin type, having the right tools and products, creating a base, adding color and contour, doing eye makeup, lip makeup, and making sure your makeup lasts with a final touch, are all key to a flawless look.
So go ahead, experiment, have fun, and remember to always show off your unique, natural beauty!
Want to learn more? Check these makeup posts:
- How to use the Color theory for Makeup
- How to Apply Foundation for Flawless Skin (Guide)
- How to make your makeup look smooth and NEVER cakey!
- Makeup 101: Learn how to do makeup pdf


