
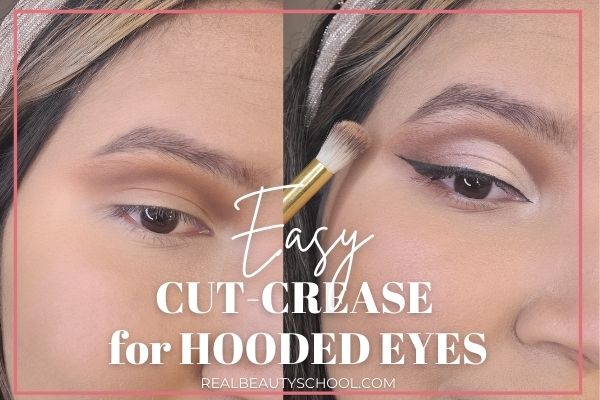
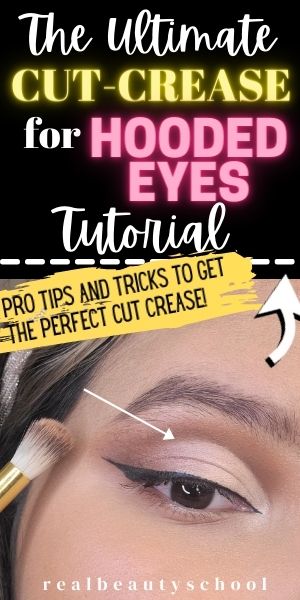
Cut-crease Hooded Eyes: Ultimate Step by Step Tutorial
Easy Cut crease makeup for Hooded eyes or droopy eyelids tutorial
I’m a makeup artist with hooded eyes obsessed with making my eyes look bigger, lifted, and opened!
In this tutorial, I’m sharing my best eye makeup tips and tricks to create the perfect cut crease for Hooded eyes in a beginner-friendly step-by-step guide.
But first things first.
This post may contain affiliate links. That means if you click and buy, I may receive a small commission (at zero cost to you). Please see my full disclosure policy for details.
How do you tell if your eyelids are hooded?
Hooded eyes are a type of eye that has “extra skin” on the brow bone area fallen down the eye, and when the eyes are open, this “extra skin” covers a little (or much) part of the eyelid, creating the illusion of little to no crease.
In case you are not sure if you have hooded eyes or not,
let me share with you 5 sentences, and if you feel identified with 3 or more, you might have hooded eyes.
- When your eyes are open, you can’t see some part of your lid
- You have a REAL struggle with eyeliner, even more with a cat-eye style
- No matter how you do it, your eyeliner looks fallen most of the time.
- You REALLY NEED to let your eyeliner dry enough, because otherwise once you open your eyes, it ruins your eyeshadows.
- Sometimes you feel like you don’t have enough space on your eye to play with your eyeshadows.
Does a cut crease work on Hooded eyes?
Yes, Cut crease work great on hooded eyes, but with doing it with some especific makeup tips en mind.
Doing a cut crease the wrong way can cause some hooded eyes to look fallen and older.
I actually love doing the cut crease makeup technique for clients or me with hooded eyes
because it enhances the eyes and makes them eyes look more lifted and open.
Related Makeup post: How to Fix Wrong Shade of Foundation with the Primary Colors
How to do a cut crease for Hooded eyes Step by Step
Step 1. Apply Eyeshadow Primer
The first step you need to do as a Hooded eye girl trying to do any eyeshadow look is applying a GOOD eyeshadow primer
that will make your hooded eyelids retain the shades properly, especially if you have oily eyelids.
My top recommended eyeshadow primer for hooded eyes is this one.
After your eyeshadow primer, set your eyelids with translucent setting powder.
It’s crucial to prep the eye perfectly for Hooded eyelids!
Step 2. Transition Shade
Now I’m using a transition shade with warm undertones, and with a fluffy medium brush, I’m tapping the product on my “fake crease.”
The “Fake Crease” Technique
I call this tip the “Fake Crease” hack because we need to find our natural crease on our beautiful hooded eyes and completely ignore it.
Instead of using your natural crease as a reference, like in almost all makeup techniques, you want to create a “Fake Crease” right above your natural crease.
Using this “Face crease” tip will make your eyes appear more open and less droopy.
Let me show you how.
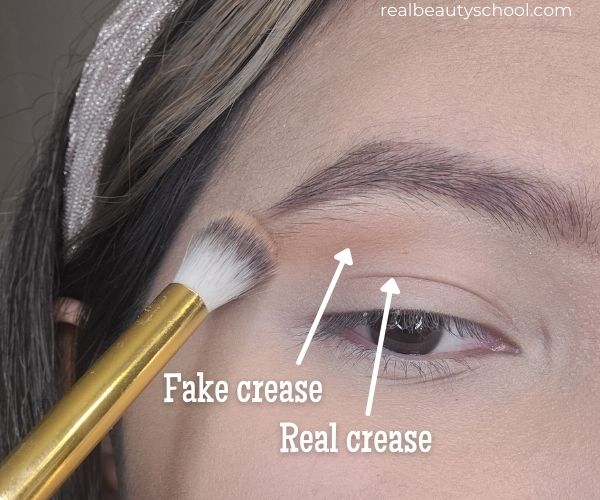
In this image above, I’m applying my transition shade some millimeters above my natural crease.
Where is the crease in hooded eyes?
The crease in hooded eyes is right below the eye bone, just on the upper side of the eye’s socket.
But to enhance hooded eyes, we usually don’t want to follow the natural crease to prevent the eye from looking small and droopy.
And the solution is the “Fake crease” technique!
Step 3. Medium shade
To intensify what we just did, we need to take a smaller fluffy brush and a medium shade in reference to the first one you used.
I’m using a range of oranges/browns,
but you can literally recreate this makeup look with any tone you prefer, like any tone of pink, blue, purple, burgundy, gray, etc.
The point is to select a medium shade that is darker than the first one, no matter the range of colors that you chose.
And this time, we want to follow or new “fake crease,”
but once you get to the outer corner of your eyelid,
keep your brush straight instead of blending in downward motions.
Here’s what I mean.

We want to do with this tip to hide some of that “extra skin” or fallen eyelid that we have and change the direction for something more straight and lifted.
Now my Makeup Book is available on Amazon! Get yours here!

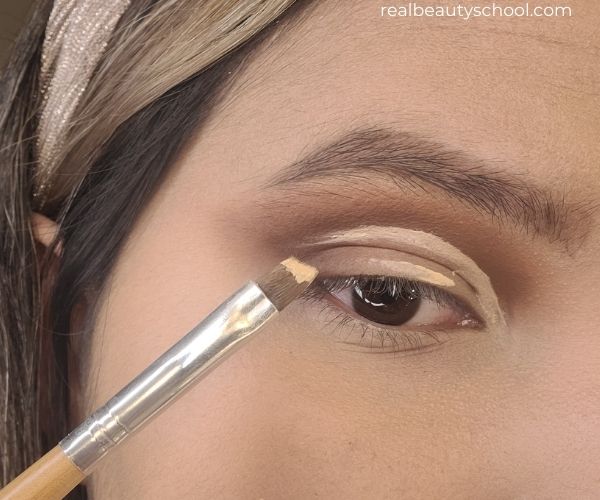
Step 4. Cut that crease! (I mean the “fake” one)
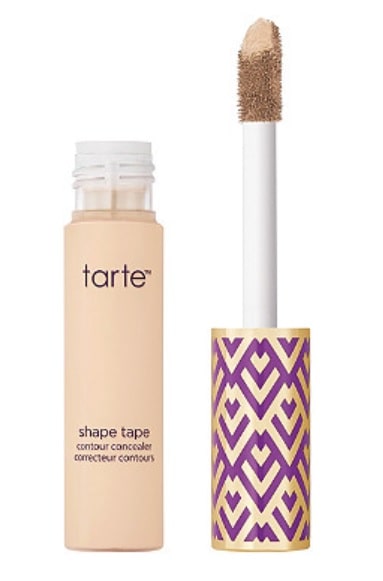
Now, take a small flat brush and your favorite matte concealer (I’m using my top favorite Tarte shape tape in this tone)
and apply some concealer on your upper lash line.
Now, open your eyes trying to get a concealer stain in your eyelid that will define where you need to create your cut crease.
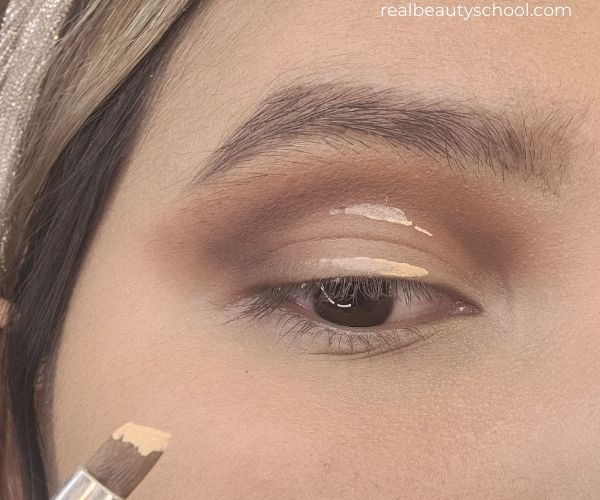
Then, draw your cut crease starting from the inner corner of your hooded eyes to the outer corner touching the line that we created with the lashline tip.
Half cut crease for hooded eyes.
You can take your concealer line until the outer corner and join the line with your lash line to get a full cut crease, but this time I’m doing a Half cut crease for hooded eyes.
A half cut crease for hooded eyes is like a regular cut crease, but instead of taking your concealer until the end of the eye, you are just leaving the line in the middle of the eyelid
and blend it well to create a beautiful transition on the outer corner.
Related Makeup post: How to do your Makeup for a First Date
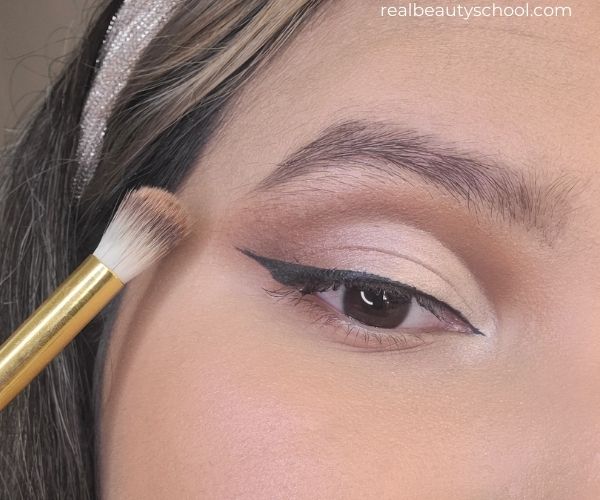
Step 5. Light shade on the lid
Using the theory of color that says that light colors enhance and bring to the front while dark colors hide and push to the back, we want to create that illusion with our hooded eyes.
We want to hide some of the brow bone and make the eyelid look bigger!
So now, we want to take a light shade (it could be shimmery) and apply it to the area where we used the concealer.
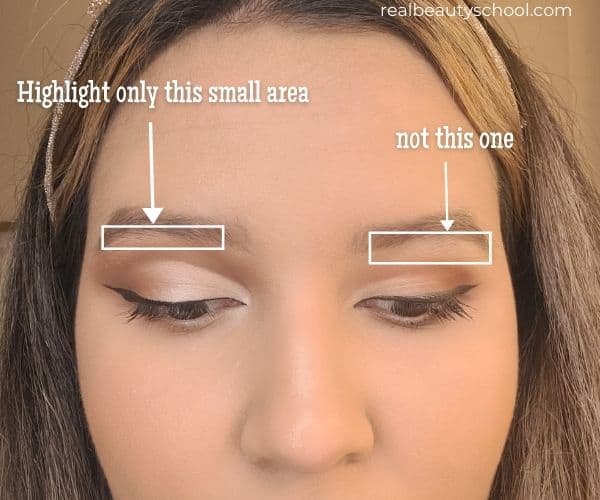
Step 6. Highlight just the right areas
The brow bone is a prominent area for hooded eyes that we don’t want to stand out so much.
Instead, we want to make it appear smaller to leave more space for our eyelids.
And the right way to do this is by applying a shimmery light shade (or highlighter) in a thin line just above our eyebrows with a thin brush and avoiding a wide highlighted area.
Here’s the difference between highlighting only a small area and the entire brow bone.
Want to learn more about color theory for makeup, eyeshadow for hooded eyes and more everyday makeup tips, check out my Makeup Book on Amazon! Get yours here!
Step 7. Eyeliner for Hooded Eyes
Some of the most essential tips and tricks for hooded eyes are on the way to apply eyeliner.
While I want to keep this tutorial focused on the right way to do a cut crease on hooded eyes/ hooded eyelids, I’m going to share with you some of the most critical points.
But you can check my full guide for a complete step-by-step eyeliner tutorial for hooded eyes.
1. Cat-eye eyeliner is your friend! If you have severe hooded eyelids or wrinkles, you can try an eyeshadow cut eye eyeliner technique.
2. Keep it thin! We want to show our eyelids as much as possible, and a thick eyeliner will only make our eyelids even smaller.
3. Always do your eyeliner with your eyes relaxed, and never pull your eye to do it.
Now you can apply false eyelashes, highlight the inner corner of the eye, apply some mascara, and you are done!
Also, check out this post on the 7 Best Mascaras for Hooded Eyes!
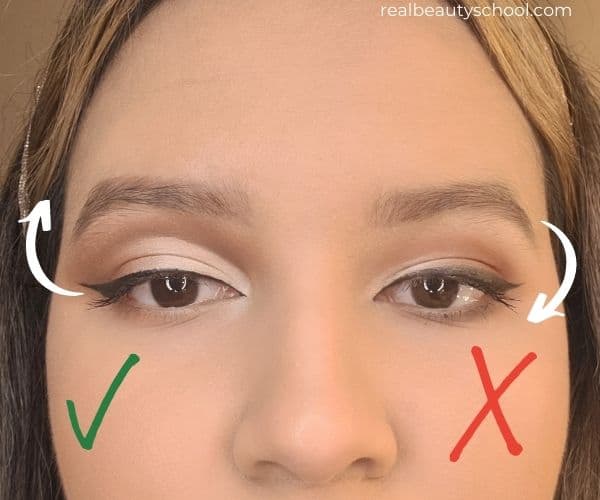
Tip: Don’t apply mascara on the bottom lashes on hooded eyes, because it can make the eye look fallen.
Here’s the difference between both eyes.
Both eyes are “correct,” and you can totally use any of both ways to do your cut crease, but the tips applied on the left eye make the eye look more lifted and bigger.
Final Thoughts on the Cut crease for Hooded Eyes
The best way to do a cut crease for hooded eyes is by cutting your crease right above your natural crease to make your eyelid appear bigger and your brow bone area smaller.
Then blend your eyeshadows in an upward direction instead of following your natural droopy eyelid.
This, combined with the correct eyeliner technique for hooded eyes, will enhance your eyes, and you will rock that cut crease!
I hope you find this post helpful. If so, don’t forget to pin it for later! And share with others.
In the comments section below, let me know what other tips and tricks you will add to this cut crease tutorial for hooded eyes?
I’d love to hear from you!
Bye-bye,
Valeria
Related Makeup posts:
- The TOP 7 Best Mascaras for HOODED EYES!
- The Ultimate Beginner’s Guide to Apply Eyeshadow like a Pro
- Easy Halo Eyeshadow Tutorial for Hooded Eyes (with pictures!)
- 10 Tips to make your Makeup last all Day!
- How to Apply Eyeshadow for Deep-set Eyes

Cut-crease Hooded Eyes: Step by Step Tutorial


Thank you so much for this beautifully presented tutorial…so very helpful !!
Thank you Mary! I’m so glad you liked it 😀
Best tutorial yet!!!! And I have been looking for the right one for years. Great work.
Thank you so much! You are so sweet!
This is awesome! I am late 40s and I have severe hooded eyes. Uugghh. I’ve never been the best at makeup so this will help me so much. Thanks ❤️
Best tutorial I have ever seen for hooded eyes thank you for sharing.
OMG, thank you so much, Nuala! I’m so happy you found it helpful.
Best tutorial ever. Thank you so much.
This was the BEST – thank you so much for sharing your secrets!
Thank you so much Cara! I’m so glad you found it helpful
Thank you for the tutorial and for the concealer recommendation. I love it!!
I’m so glad you liked it! Thank you for stopping by the blog.
I’m 76 but still want to look my best. THANK YOU for the hooded eye tutorial. Can’t get rid of all the wrinkles, but now I can at least look better in my eye makeup.
Hi Marilyn! Thank you so much for stopping by my blog; I’m so glad you found it helpful!
And, of course, there’s no age for beauty and working to be the best version of ourselves.
Thank you so much for your tutorial ? it was very helpful I ? absolutely love it.
I’m so happy that you enjoyed it! Thank you so much <3